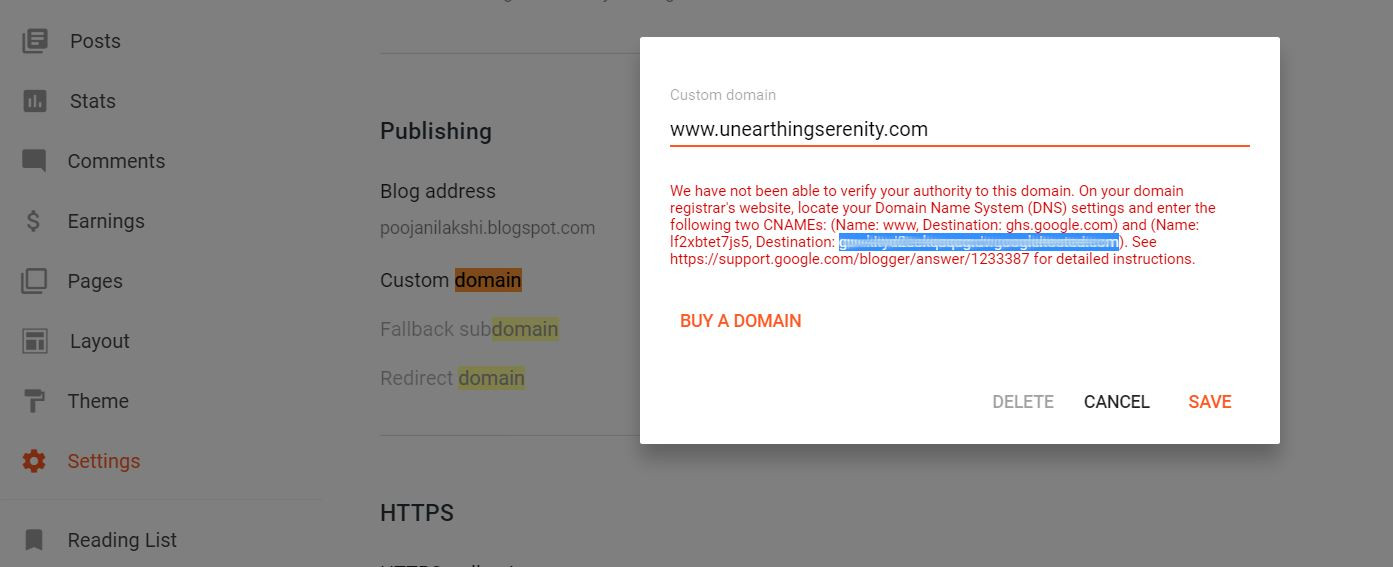
- Login to https://www.blogger.com/ and go to Settings -> Basic. Input your domain in the Third party domain settings field.
- Copy host and destinations (Highlighted in blue) and paste to the domain DNS settings later.
- Download the DNS settings and copy the values so we can add those values to the DNS setting as well.
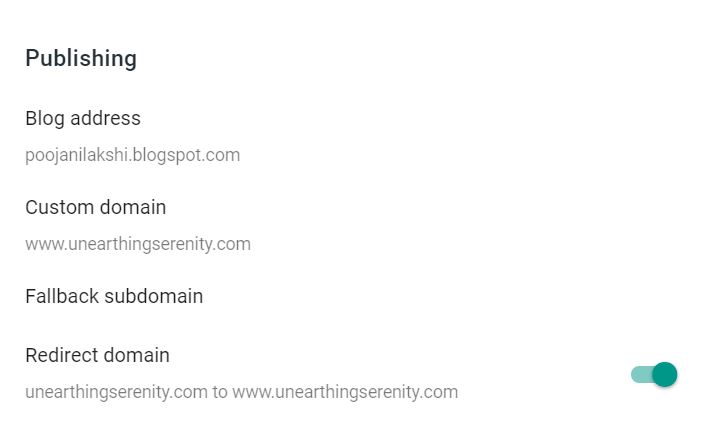
- To redirect to www always, check the radio button (Highlighted in green).
- Select yes for both HTTPS Availability and HTTPS Redirect to enable https [No need to buy a service to enable https].
 |
| Blogspot domain settings |
Now lets change DNS settings of the domain. [ DNS settings UI might differ based on the vendor, bu the method is the same.]
 |
| DNS Settings |
Add A and CNAME records to your domain according to the image to enable both https://harshajayamanna.com/ and https://www.harshajayamanna.com/
I have done this far too many times and most of the instructions I found on the internet contain too much description.
Hope this will be the most simple explanation ever.
UPDATE 2020/07/18
Blogspot UI was updated recently.
First, I added the custom domain to the Blogspot. When you include that you will be given more information on how to add CNAME records to your domain. After that, I enabled redirection from non-WWW to WWW.
 |
| Add domain to Blogspot |
 |
| Redirect to WWW |
Next, update the records in GoDaddy. All the records I have added are marked with black arrows.
 |
| Update GoDaddy |
The final step is to enable https. Blogspot provides you free https and you can enable it if you wish to.
 |
| Enable https |

Comments
Post a Comment